nails manicures
 I'm really excited for this blog post today because I've been thinking about it for a while. I've been playing around with the idea of investing in a gel nail system for myself so that I can do my own gel manicure at home.
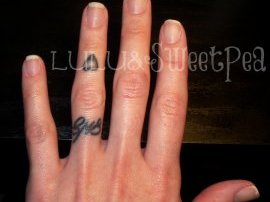
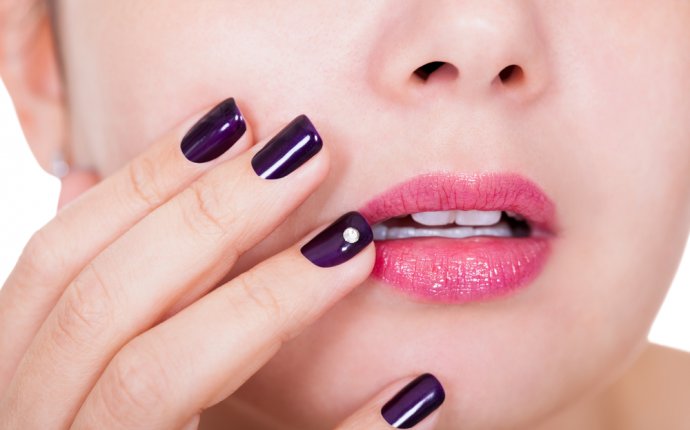
So what's so great about gels? Well, think of it as really long lasting nail polish. It doesn't chip, doesn't lose its shine, and stays on for up to 2 weeks! It cures with a UV or LED light and as soon as it's finished curing under the light the gel is completely dry and hardened. No joke- I went from doing my nails to washing dishes by hand just a few minutes later without messing up my nails at all.
Here's one thing you need to know about me: I am a nail technician. I went to beauty school to become a nail tech and then ended up going back again to do hair. However, I didn't have a ton of knowledge on gel nails until recently because we didn't cover them very much in beauty school. When I was a student, gel nails weren't popular. Acrylics were. So that' mostly what I did in school- full sets of pink and white acrylic nails. I had only worked gel a handful of times in school and never really did them in real life. So while I do have a better understanding of nails in general, I'm still very new myself to the whole gel thing.
Upon hearing all of my old beauty school friends (who are now successful hairstylists) rave about their Shellac manicures, I decided to do my own research. I wanted to try Shellac, but I wasn't about to pay to have them done in a salon when I've been doing my own acrylics for years. I was able to try out some of my friends' gel products and hear their personal experiences and testimonials.
 Since I'm also a blogger and an avid DIYer myself, I went to the internet and blogs to try to find some good information on doing gels yourself at home. I read tons of tutorials from various blogs and beauty websites. Most of them were OK at best. First of all, they all lacked pictures, and I need pictures! I have to see what you're talking about. Most of the tutorials just lacked information. Sure, was able to follow the step by step instructions, but I don't need as much information as the average person because I have experience. I realized that the average woman attempting gels for the first time was probably left feeling slightly confused by these tutorials.
That's when I decided to do my own. I feel like with my professional knowledge and a little of my own trial and error, I've put together a pretty in-depth tutorial on doing your own gel nails at home. I know the mistakes these other tutorials are making because I see it from two perspectives: 1 as a professional, and 1 as your DIYer/beauty blogger.
Before you decide to spend the money on a gel system, there are a few things you need to know about gel nails. I don't want anyone spending a bunch of money on this stuff without knowing the following:
- A gel system can be expensive when you first start doing them yourself. I spent about $125 on my basic set up.
- Gel nails can't be rushed. This is a time consuming system that requires patience. If you can't set aside an hour to an hour and a half for your first at home application then this is not for you.
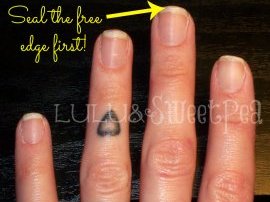
- You can't skip steps. If you cannot follow the instructions exactly, your nails absolutely will not turn out.
- Gel nails can't be interrupted. While you're doing your nails, you can't be doing anything else. No eating, no texting or talking on the phone, etc. The nails are not 100% set until the very last step. If anything touches them or contaminates the nail or gel before the last coat is applied, the nails will not turn out correctly.
 {not pictured- nail wipes}
*Can substitute Isopropyl alcohol for Cleanser.
**PH Bond is not a must-have, but it's nice to have. If you don't have it you can skip it!
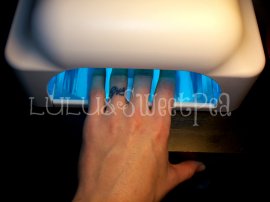
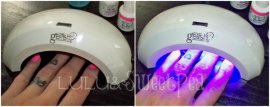
Here's what you'll need to get started:This is an amazing deal on a complete starter kit, including the LED lamp that cures in 45 seconds. I highly recommend this set up to get your started. You really cannot beat the price!
If you already have a lamp (or want to use a different brand) this is a great deal on the Basix Kit!
UV or LED Lamp .
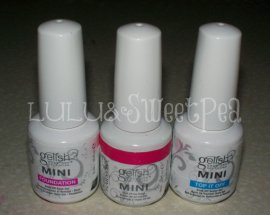
Gelish Foundation, Gelish colored nail polish, & Gelish Top It Off. These are the 3 essential steps in your gel manicure. You'll need the Foundation Gel (base coat), the Gelish colored nail polish you want, and then Top It Off to seal your manicure. With your club card, Foundation Gel is .95, the colors will run you .95 each, and Top It Off is .95 as well. That's about for the Gelish products you'll need to do your first manicure. Each bottle should get you 15-20 full manicures.99% Isopropyl Alcohol or Cleanser.
 Most instructions will say you need Gelish Cleanser to do your gel manicure. This is not entirely necessary for doing your own nails at home, and you can substitute 99% Isopropyl alcohol instead- either is fine. *Please note* I am aware that in a salon the nail tech does need to use Gelish Cleanser on the client rather than plain alcohol to correctly follow all safety and sanitation procedures. However, chances are if you're doing your nails at home, you are the only one using the products and this extra step for sanitation isn't necessary. If that is the case, Isopropyl alcohol is perfectly acceptable to use as a substitution.
Lint Free nail wipes. These are a must. Regular paper towels or wipes are not recommended.
Sunscreen. If you're using a UV lamp. If you're using LED, you can skip it!
Basic manicure tools. You'll need a cuticle pusher, a 180 grit file (also called a zebra file. Ask the sale's clerk), a nail buffer, an orange wood stick, and cuticle oil.
Desk lamp or extra light. You need good lighting to apply your gel nails properly. Grab a desk lamp and make sure your hand is directly under the light while you're applying the product. You should be able to clearly see each nail from every possible angle.